16 February 2011

HandHand : Bee Mine!!

Bee Mine!!! Valentine

Items needed:
Coloured Cardboard
Yellow paper / Yellow Crepe Paper
3 Pipe Cleaner (2 Black & 1 Yellow)
Googly eyes
Lollipops
Paper puncher
Scissors
Glue


Step 1:
Cut one black pipe cleaner into half.


Step 2:
Fold the pipe cleaner into half.


Step 3:
Take the other two pipe cleaner (black and yellow) and go round the pipe cleaner which have been folded into half. Twirl round until finish. Make sure make a small loop so that there will be space for the lollipop. Also make sure that youe do not go round the whole pipe cleaner. Leave some for the bee's tentacles.


Step 4:
Cut out the bee's wings using the yellow coloured paper / crepe paper. Glue it behind the bee.


Step 5:
Glue googly eyes.


Step 6:
Shape the tentacles of the bee to make it look attractive or cut it shorter.


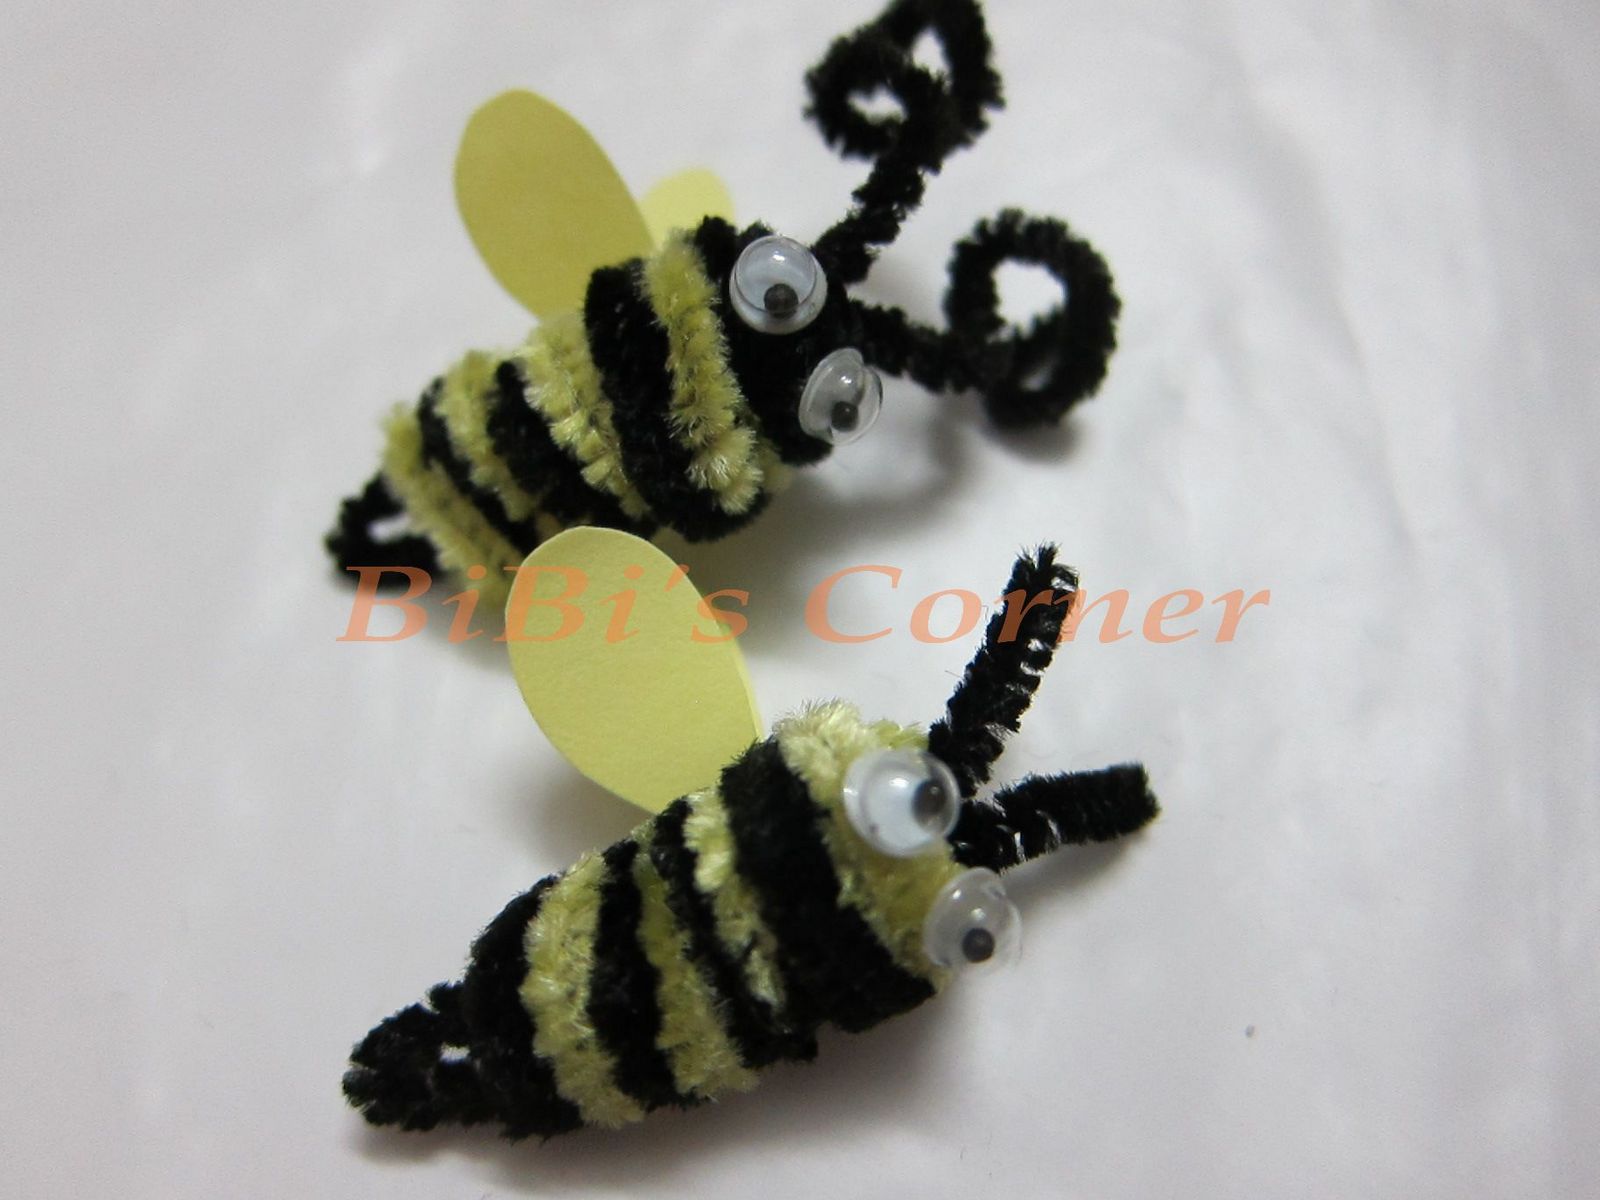
You have made a bee!!!
Step 7:
Cut out heart shapes from the coloured cardboards.
Click here:
Heart Shape Template


Step 8:
Punch two holes on the heart shaped cardboards.


Step 9:
Stick the lollipop into the loop which you have made on the bee. Then put the lollipop through the two holes which you have made on the heart shaped cardboard.


Step 10:
Write "Mine" on the heart shaped cardboard. You can write a personal message behind if you want to.


You have completed a Bee Mine!!! Make one for your loved ones as gifts to remind them that they are special to you.

15 February 2011

HandHand: Origami Rabbit

OrIGaMi RaBbIT


Items needed:
Paper
Glue (optional)
Cotton wool (optional)
Googly eyes (optional)


Step 1:
You need a square piece of paper.


Step 2:
Fold the paper into half to make a crease line.


Step 3:
Then fold both sides of the paper to meet the crease line which you have made in Step 2.


Step 4:
Fold the corners to meet the centre. Fold all four corners, then unfold it. You will have crease lines on all four corners.


Step 5:
Open up one corner and fold the corner inwards, following the crease line which you have made in Step 4. Fold all four corners similarly.


Step 6:
Turn the paper over. Fold the right flap to the centre. The point should meet the center line. Fold the left side of the flap similarly too.


Step 7:
Turn the paper over again. Fold one side of the paper to meet the centre. Fold the opposite side as well.


Step 8:
After that, fold the right side of the paper to the left. You can see here that the rabbit's face is starting to take form.


Step 9:
Then gently fold the paper into half. Make sure that you do not fold the whole paper into half. You have to form the rabbit's breast.


Step 10:
To make the rabbit stand, you need to fold its legs by making a crease. Fold the right flap to the left as shown in the picture. Then unfold.


Step 11:
Open up the back of the rabbit. And fold the crease lines which you have made in Step 10 inwards.


Step 12:
To make the rabbit nose, fold the point upwards to make a crease line. Then fold the point inwards.


Step 13:
To make the rabbit look nicer, fold the back of the rabbit a little bit. Fold the other side as well.


Step 14:
Shape the rabbit's ears by opening it up.


You can make the rabbit's tail by rolling up some cotton wool and stick it to the back of the rabbit. Add googly eyes or draw a pair and stick it on.


You have a rabbit!!!
Make it in different colours or papers with patterns to get different effects.

Related Posts Plugin for WordPress, Blogger...