FeLt FoRtUnE CoOkIeS
Items needed:
Felt
Scissors
Glue
Round template
Double sided tape (optional)
Magnetic sheets (optional)
Step 1:
Trace a circle onto the felt. Then cut it out. (Note: The size of the fortune cookies are dependent on the diameter of the circle)
Step 2:
Fold the circle into half and put some glue on the tip of the circle.
Step 3:
Then fold the circle half again on the straight side of the fortune cookie.
Step 4:
Apply some glue on the area which is folded.
You have completed a fortune coookie!!!
To make it into a magnet as a gift or just to have it on your fridge as decoration, cut the magnetic sheets in small squares. Cut the double sided tape and attach it to the magnetic sheet.(Note: Make sure that you stick the double sided tape on the side which is not magnetic.) Then stick it onto the completed fortune cookie.
Use different coloured felt to get a bunch of colourful fortune cookies!!!
Tip: You can also use coloured paper to make the fortune cookies.
Ribbon Flowers
Items needed:
Ribbons (Different width sizes)
Button
Needle
Thread
Glue
Craft pin
Scissors
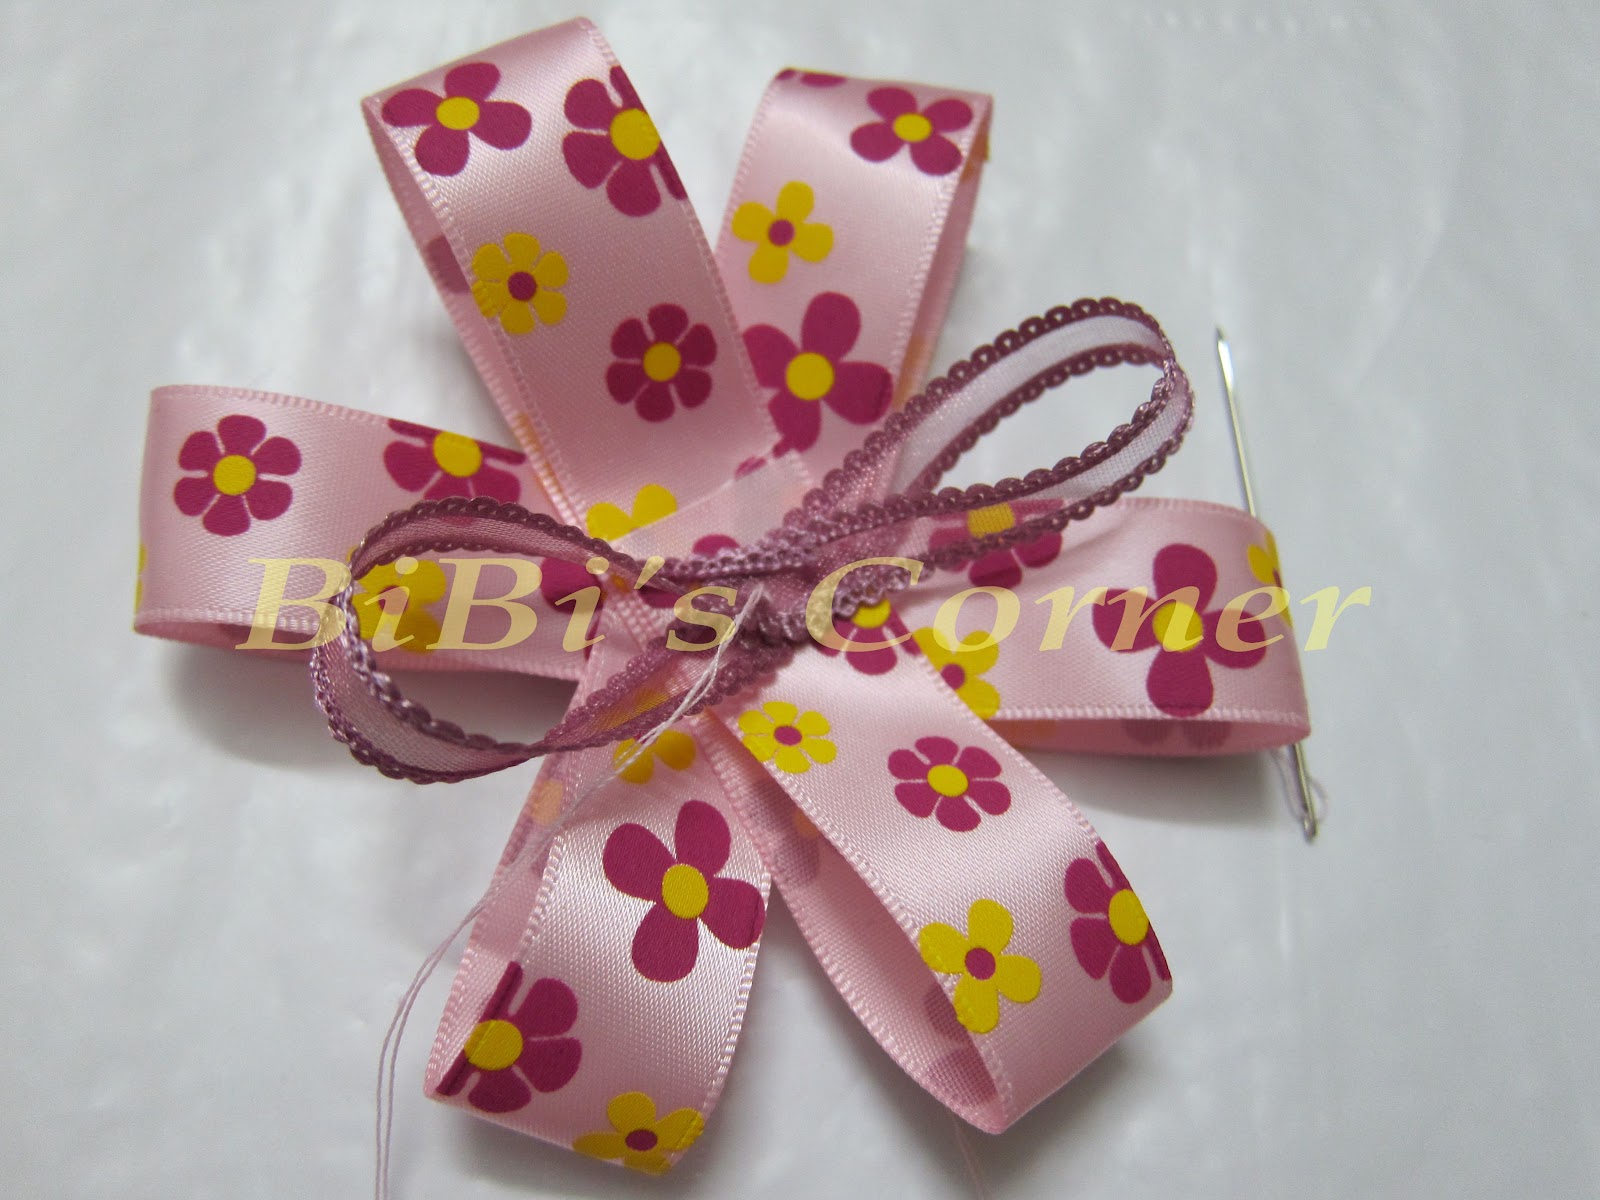
Step 1:
Cut the two different ribbons into 3 equal lengths. Make sure that the ribbon with a wider width is longer than the thinner one. I cut mine 22cm and 18cm respectively.
Step 2:
Take one ribbon, fold it into half and make a crease. Then fold both sides of the ribbon to the crease line.
Step 3:
Make sure that the ribbon overlaps each other. Then sew it to secure the shape of the ribbon. Use normal stitches, up and down making sure that each stitch secures the ribbon.
Step 4:
Take the second ribbon and repeat Step 2. Then put it across the ribbon made in Step 3. Sew it together to secure the shape of the ribbon.
Step 5:
Take the third ribbon and repeat Step 2. This time put the ribbon diagonally on the ribbon made in Step 4. Sew it together to secure the shape of the ribbon. You have made the base of the flower.
Step 6:
Take the thin ribbon and repeat Step 2 - Step 5. You have made a flower.
Step 7:
You can secure a coloured button in the centre by sewing or gluing it onto the ribbon. Now you have a ribbon flower!!!
Step 8:
You can sew the flower onto your bag, glue a craft pin behind and use it as a brooch or pin it on your favourite purse.
Use your creativity by mixing and matching different types, patterns and coloured ribbons to create a variety of ribbon flowers. Here are some examples to start you off.